
Replacing an Electrical Plug
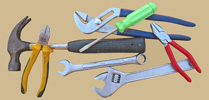
Step 1: Before replacing an electrical plug end make sure the lamp or appliance is unplugged, then simply cut the old plug off, leaving as much good wire as possible.
Step 2: With kitchen scissors – or wire cutters – which ever you prefer, snip down the center of the cord and gently pull the wire ends into two separate halves, about two inches long.
Step 3: If your new plug came in a package, follow the diagram on the back. Some quick connect plugs require you simply to snap open the plug, place the wires inside and snap the plug shut.
Step 4: Otherwise, strip away the plastic coating of the wire enough to expose about an inch of the shinny copper strands. Twist the strands to form two separate tight little probes and stick the wires through the bottom of the new plug end.
Step 5: If the new plug has screws on the blades, loosen the screws, bend the wire ends into a “J” shape and hook them around the screw. Be sure to hook them in the same direction the screw turns to tighten, this way the wires will not come loose as you tighten down the screw head.
Step 6: Once both wires are securely twisted and tightened under the two screw heads, pull the plug end cover up over the metal blades, snap the protective end piece on and plug in your new and improved lamp or small appliance.
Email us at info@you-can-fix-it.com to request new fix-it ideas. We also encourage you to add comments or suggestions below each article.
| You-Can-Fix-It.com
|
Leave a Reply